
 | Issue 77 Inside Crochet you will find my Magical Owl bag pattern |
 |  Full kits are in either DK or Natura at my online store |
 | I would love to see your completed bags, so please post pictures on my facebook page. |


Click on the pictures to visit my online shops.

Crochet Patterns Craft Supplies
| Issue 77 Inside Crochet you will find my Magical Owl bag pattern |
| Full kits are in either DK or Natura at my online store |
| I would love to see your completed bags, so please post pictures on my facebook page. |


.....I had a full set of Clover Amour.

|
My son connived with a friend. I had half the set from him and the other half from her. I would show you the full set but they are scattered about in various projects, as any good hook should be. |
This Christmas, my son bought me some beautiful hand made candle stick holders.
Not that I plan to use them for candles but they will make beautiful bud vases for when I finally get all those crocheted flowers done.
|
So, I treated myself. A new set of Clover Amour, thread ones this time, in pastels to match the bright colours of the larger sizes. The only reason you get to see the full set is because they only arrived last Friday and the projects I am current working on are yarn not thread. |
 |
Soon, they will be scattered about in various projects.
And did you know, they come in bigger sizes now!
A whole load of events, over which I had no control, seemed to take over last year.
First there were the Distance selling regs which meant I had to re-evaluate the way I ran the website. With Ravelry not being able to provide a shopping cart which complied with the regulations, I had to change my instant download provider.
Then came the EU VAT. More changes to the website but many of which could no be done until the last minute due to not having clear guidelines to follow.
All of this meant no new patterns!!!!!
 |
That is set to change this year. My first pattern is finished already! This Tiger blanket (no, not a Zebra) was designed in collaboration with one of my students, partly as a learning exercise. She is making hers in orange and black DK. I just used some yarn I had in my stash which happened to be cream and grey aran. It is worked in 3 panels, with the middle one being flipped over to match up the stripes before they are sewn together. |
|
Short rows are used to make the wiggly stripes. These also make for an interesting pattern on the background. The pattern is just the first four stripes which are repeated. Because is is designed this way you can make it as big or as small as you wish. And in any type of yarn. The pattern is currently with testers and translators. Watch this space for when it will be available. |  |
I went to the "Festival of Quilts" at the NEC last weekend, while I was in Penarth visiting my parents. Knowing that anything I bought would have to fit in my case to be brought home via the London Underground, I had no intentions of buying anything.
But fabric is so much more compact than yarn!
I bought a 3 metre piece of lovely cotton with the plans to make a new skirt and top set. That is the floral piece in the background.
|
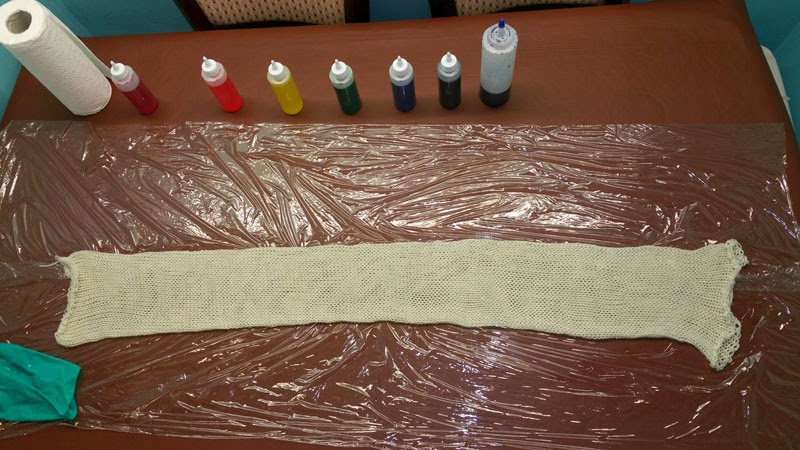
Then I saw this stunning hand dyed fabric. Very expensive but soooooooo gorgeous. It is made by Farbstoff. The lady was lovely and spent ages helping me find the right colours. Originally I was looking for a pice to photograph my work on but I ended up getting two pieces, the second one to make jewellery stands with. |

|
Yes, I know they are going to work out very expensive jewellery stands but I need something special for when I finally get around to designing the silk jewellery.
I used a template I found online. Stella & Hodge show you how to make some simple stands that fold flat. They make theirs from card. The template is perfect for what I wanted to do. I just wanted them posher.

| I had also bought some very thick interfacing at the show. I went stash diving and found the Bondaweb and then I was ready. |
| As interfacing doesn't score and bend like card, I cut one full piece. The second piece was trimmed just inside the dotted lines of the template so that the pieces didn't touch. |

|
 |
I ironed the pieces all together and then got out the sewing machine. I tucked ribbon between the interfacing and the fabric. I did a single line of stitching, from the back, along the centre of the gaps in the second layer of interfacing. |
|
As my machine does embroidery stitches, I used some to decorate either side of the lines. This was done from the front. This is partly to make it pretty and partly to make sure the interfacing stays firmly in place. I know from exereience that as Bondaweb get older, it loses its "stickiness". I do not want my stands falling apart while on display. |

|

| Finally, fold the hem over, sew a single line of stitching from the back to hold it all in place. Then a decorative row just inside from the front. |

I only had enough interfacing for 3 stands so bought some iron-on interfacing to make the other two. It was no where near as thick so I used three layers to build it up. This way worked out a lot cheaper than the using the thicker interfacing and Bondaweb, it just meant more cutting out to do.
If I make any more, I would just use one layer for the full template and build up the strength in the separate pieces. This will give a much sharper fold line and make them sit better. I would also use thinner ribbon and magnetic catches in stead of having to ties bows each time.
Now all I have to do is design the silk jewellery to display on them.
Actually, it started yesterday. The sewing machine wouldn't work. I took it all apart, cleaned it out then the door bell went. It was Sue for my class which I had forgotten all about. Actually, I had forgotten it was Wednesday but that is just a minor fact.
Then last night I managed to turn the computer off at the plug before it finished shutting down. When I switched it back on this morning it threw a temper tantrum or two. I had to leave it scanning and fixing the hard drive.
Then I put the sewing machine back together and it still wouldn't work. Very strange since it worked perfectly the last time I used it. Turns out there was a rogue bobbin in my box which I had just happened to use. I rewound the thread on to another bobbin and we were well away.
Back to the computer. Everything working fine - except for Kaspersky. It was complaining about a few things so I had to re-install.
Back to sewing. Going along nicely until I realised I was running low on thread. No thread that colour in Chatteris so it was off to trusty old eBay.
And the title? Murphys Law - Anything that can go wrong, will go wrong!
|
The Numbers are available on the Childrens page of Rainbow Valley The butterflies are from "Scrapping with Crotat" and are available on the Scrapbooking page of Rainbow Valley | 
|
Ok, so I understand the concept of CSS. I am also amazing at "Copy and Paste". So all I need to do is find the relevant coding and C&P it into the right places?
Errr, Nope!
I won't bore you with the details but there was a lot more work than that to get the pages looking like they do. However, you may think, apart from the fact I put the navigation buttons down the side, that they do not look a whole lot different. They may not to you but, trust me, they do to Google!
Go and have a look!

I managed to get the patterns pages finished well before the deadline for the new selling regs. This included the new T&C page along with a cancellation form. I also managed to get the T&C pdfs upload to all of my Ravelry patterns. Whether people actually download them, is another matter.
However, Ravelry does not have the tick box required by EU sellers to protect themselves from unscrupulous people and this is one of the reasons I have decided not to use their download facilities on my site any more.
I have found a new instant download provider and, I must say, I am loving it!
Yes, more work to do on the website. More learning curves. And more late nights.
Watch this space for more news!

|
Number 11 completed. The Numbers are available on the Childrens page of Rainbow Valley The Snails are available on the Scrapbooking page of Rainbow Valley |
|
Number 8 finished! The Numbers are available on the Childrens page of Rainbow Valley The Poppy is available on the Scrapbooking page of Rainbow Valley |

|
So, there I am thinking that I can learn all of this new stuff gradually when I get thrown yet another curve ball.
There are new selling regulations which are coming into force all over Europe on June 13th 2014 and my website has to comply with them!
Panic!
These new regs are "The Consumer Contracts (Information, Cancellation and Additional Charges) Regulations 2013" and have been updated to include a new section to cover the selling of "Digital Downloads" and that means me!
If you buy anything online, you have 14 days in which to change your mind and inform the seller. You then have another 14 days in which to return the item and the seller has 14 days from its safe return to issue a refund.
You generally do not have a right to cancel once a digital download has started. However, this is only the case if you have been told and given your explicit acknowledgement. You generally do not have a right to cancel once a digital download has started. However, this is only the case if you have been told and given your "explicit acknowledgement". The simplest way to gain "explicit acknowledgement" would be a tick box at the check out.
The problem here would be that I do not have my own check out. I use a variety of selling platforms across the www. Mostly USA based who do not have to conform to these rules and are not willing to change things to help European sellers comply with regulations.
We think we have found a way around this while still complying but trying to get a straight "Yes" or "No" from anybody official is like banging your head against a brick wall.
Back to that steep learning curve. Instead of learning everything gradually, I am having to learn it all at once. Mostly I can find what I need online and adapt it to my needs. But sometimes I get totally stumped and have to look for an alternative way.
I think, by the time I have finished, I will have earned a degree in "Copying, Pasting and Fudging it". But I am quite pleased with what I have achieved so far.

|
Number 4 finished! The Numbers are available on the Childrens page of Rainbow Valley The Daisies are available on the Scrapbooking page of Rainbow Valley |
It has been rather a long time due to other commitments but I have finally finished number 10. The Numbers are available on the Childrens page of Rainbow Valley The flowers are from "Scrapping with Crotat" and are available on the Scrapbooking page of Rainbow Valley |

|
I have never been one to air dirty laundry in public. I like my private life kept private. The problem is that things happening in my personal life have drastically affected my professional life.
So, without going into too much detail, here is what has been happening over the past few months while I have been extremely quiet.
Just before Christmas, I left my partner of 10 years. I hadn't been happy for a while. My son certainly hadn't. And over the weekend of November 30th/December 1st, things happened which made me evaluate my situation and make the decision to leave.
It wasn't an easy decision to make, in fact it was one of the most difficult decisions I have had to make in a very long time. But needs must and on the Friday of that week I moved into a new house with my son.
I moved in with my partner with a whole heap of belongings but, over time, they had been whittled down and I moved out with very little.
This is when you realise what amazing family and friends you have!
Money, furniture and household items came from all directions and in no time at all, my new house was a cosy home.
Of course, moving that quickly meant no internet but, again, I had loads of offers to go and make use of a variety of WiFi connections. I had to rely on my poor little, overworked netbook but I was able to keep an eye on things. My internet was connected mid December but trying to run a business on the net book proved very difficult.
My other major problem was that I lost all motivation to crochet - not a good thing when that is how you earn an income.
While I was struggling with the curve ball life had thrown at me, my son positively bloomed. As hard as the decision had been, I knew it was the right one.
Life marches on and that was nearly six months ago. Things have changed. I feel better apart from an occasional pang of regret. Not for leaving, I certainly don't regret that, more for not realising what I did a lot sooner. But the past is in the past and that is where it should stay.
The future holds so many possibilities.
And I have so many plans!
This time next year Rodney, we are going to be millionaires............

|
Number 2 finished! The Numbers are available on the Childrens page of Rainbow Valley The Pansies are available on the Scrapbooking page of Rainbow Valley |
|
Number 9 finished! The Numbers are available on the Childrens page of Rainbow Valley The Bees are available on the Scrapbooking page of Rainbow Valley Now I know when it is quarter past and quarter to. And it is actually looking like a clock on the wall. |

|

|
Number 3 finished! The Numbers are available on the Childrens page of Rainbow Valley The Ladybirds are available on the Scrapbooking page of Rainbow Valley |
|
Now I know when is it 6 o'clock. Or half past 12. Or I will do when I get it up on the wall! Decorated with Violets from "Scrapbooking Flowers & Friends" which is available on Rainbow Valley |

|
 |
Number 12 completed. The photo is taken on my keyboard to give you some idea of the size. If you are anything like me, you see a measurement and need to get a ruler out to see how big it is. If you are not like me, you will probably want to know that it measures about 12cm tall. Yes, this is going to be a big clock! And the details? |
The Numbers are from Alphabet Mobiles - Numbers which are available on the Childrens page of Rainbow Valley
The decoration is from two of my free patterns, Doodling and Mini Flowers which are available on the Scrapbooking page of Rainbow Valley
