Click on the pictures to visit my online shops.
PayHip Pattern Shop   Square Supplies Shop

Crochet Patterns     Craft Supplies   

Showing posts with label free tutorial. Show all posts

Sunday, August 17, 2014

Posh Jewellery Stands.

I went to the "Festival of Quilts" at the NEC last weekend, while I was in Penarth visiting my parents. Knowing that anything I bought would have to fit in my case to be brought home via the London Underground, I had no intentions of buying anything.

But fabric is so much more compact than yarn!

I bought a 3 metre piece of lovely cotton with the plans to make a new skirt and top set. That is the floral piece in the background.

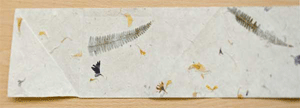
Then I saw this stunning hand dyed fabric. Very expensive but soooooooo gorgeous. It is made by Farbstoff. The lady was lovely and spent ages helping me find the right colours.

Originally I was looking for a pice to photograph my work on but I ended up getting two pieces, the second one to make jewellery stands with.

Yes, I know they are going to work out very expensive jewellery stands but I need something special for when I finally get around to designing the silk jewellery.

I used a template I found online. Stella & Hodge show you how to make some simple stands that fold flat. They make theirs from card. The template is perfect for what I wanted to do. I just wanted them posher.

I had also bought some very thick interfacing at the show. I went stash diving and found the Bondaweb and then I was ready.
As interfacing doesn't score and bend like card, I cut one full piece. The second piece was trimmed just inside the dotted lines of the template so that the pieces didn't touch.


I ironed the pieces all together and then got out the sewing machine. I tucked ribbon between the interfacing and the fabric.

I did a single line of stitching, from the back, along the centre of the gaps in the second layer of interfacing.

As my machine does embroidery stitches, I used some to decorate either side of the lines. This was done from the front.

This is partly to make it pretty and partly to make sure the interfacing stays firmly in place. I know from exereience that as Bondaweb get older, it loses its "stickiness". I do not want my stands falling apart while on display.

Finally, fold the hem over, sew a single line of stitching from the back to hold it all in place. Then a decorative row just inside from the front.

I only had enough interfacing for 3 stands so bought some iron-on interfacing to make the other two. It was no where near as thick so I used three layers to build it up. This way worked out a lot cheaper than the using the thicker interfacing and Bondaweb, it just meant more cutting out to do.

If I make any more, I would just use one layer for the full template and build up the strength in the separate pieces. This will give a much sharper fold line and make them sit better. I would also use thinner ribbon and magnetic catches in stead of having to ties bows each time.

Now all I have to do is design the silk jewellery to display on them.

Tuesday, November 29, 2011

I have been working very hard!

Free Crotat Download

In the summer I had a Crotat article and pattern published in Inside Crochet.

I have re-written the article, taking into account feedback from readers and teaching workshops, so that it now includes more detailed instructions and more advanced techniques.

But the best news - for all of you - is that all of this hard work on Rainbow Valley.

If you have a go, I would love to see the results. Pop along to my Facebook page and post there.

Sunday, April 11, 2010

I can crochet a Rainbow

And so can you!

I has come to my attention that so many people out there can crochet but can not follow a pattern.

This is the one that was featured in Scrapbook Inspirations in 2008.

With this in mind, I have adapted my free Rainbow Pattern over on Rainbow Valley to one that is just for those learning to read patterns.

It really isn't that difficult when you know how!

Tuesday, October 28, 2008

As Promised..........

Indoor Fireworks!

These are perfectly safe, no fire involved.

You will need 2 paperclips, a strip of strong paper or card and some streamers.

I have used shredded foil paper for the streamers as I thought it would sparkle like the fireworks actually do.

Fold the card over but do not crease it. Use the paperclip to hold it in place.

Turn the whole thing over then repeat with the second paperclip, making sure it only goes over two layers of card.

It should look like this from the top.

Finally, tie your streamers to the paperclips.

Now the fun bit.

Take hold of each end of the card and hold it at arms length.

Pull the ends apart quickly and shout "Bang!"

Enjoy!

Monday, April 28, 2008

Make Your Own Designer Labels

My new iron on t-shirt transfers arrived this morning to I made more labels. I need some to do on the back of the new Winter and the Dragonflies.

I thought, that as I was doing them anyway, I might as well take some pics and post the instructions.

All you need to do this is some cotton tape which is readily available from most haberdasheries and some printable iron on t-shirt transfers.

First of all, buy your cotton tape so that you know what size to make your label.

Next, design your label. Keep it as simple and clear as possible. Remember it is going to be quite small so it need to be easily read. The height of it also needs to be just a little smaller than the cotton tape.

MOST IMPORTANT!!!!!!

Remember to flip your label over before continuing.

Fit as many of them as you can on to an A4 sheet. The more you fit on, the cheaper it works out. Don’t forget to allow for printer margins.

Alternatively, if you doing it in a photo program, fill the whole sheet then use the “fit to page” option.

Cut the labels into individual pieces.

Following the manufacturers instructions, iron on to the tape. Make sure you leave a gap between each label to be able to fold over the raw edges to sew on.

Remove the backing.

Cut into individual labels.

And I couldn't be so cruel as to make Mandi Jane wait any longer so......

Here are some pictures of what I did with some lovely hand made beads Mandi Jane sent me as a pressie.

I used black crochet thread so that they will match the new t-shirt I am working on.

The finished set..

Close up of the necklace.

Close up of the earring.

And me wearing them!

Tuesday, January 08, 2008

Hidden Journalling Notebook

I was shown how to make this little notebook a few years ago and, on finding it at the bottom of my craft drawer, decided to share it. The photos aren't great as I was playing with my new lens and I didn't take a whole lot of time over editing as I wanted to get it done!

Step 1
Cut two strips of paper, one patterned and one plain. They can be any size you would like but must be 8 times as long as they are wide and the plain one should be a little smaller than the patterned one.

Step 2
Fold the plain piece into 8 equal sections. Each one should be a square.
This is the pages for your book.

.

Repeat for the patterned piece but fold all the creases both ways. Then make the additional folds, again folding both ways.

Step 3
Lay the patterned piece flat on the table with the right side up.

.

Step 4

Fold at fold 1

.

.

Step 5
Fold at fold 2

.

.

.

.

Step 6
Turn the whole thing over.

.

Step 7
Fold at fold 3

.

.

.

.

Step 8
Fold at fold 5.

.

.

Step 9
Fold at fold 4 and tuck the flap under.

.

.

.

Step 10
Turn the whole thing around and repeat steps 4 to 9 for the other side.
This is the cover for your book.

.

Step 11
Turn the cover over and place the plain piece as shown in the picture.

.

.

.

.

.

.

.

.

Step 12
Slide the end squares of the pages into the cover and fold in half.

If you would like a pdf version of these instructions, you can download it here.

Thursday, July 26, 2007

Blocking

No, this isn't something you do to stop people contacting you, at least, not in crochet terms.

When you crochet a piece it all curls up. When working with acrylic, the easiest thing to do is to lightly iron it between two damp cloths. However, when working with cotton there is a much better way. Blocking.

As most of what I do is with small pieces, I use a small cork notice board with some kitchen towel laid over it. I just run the piece under the cold tap, squeeze it out then pin it in shape. Make sure your pins are rust proof!

As the cotton dries it tightens a little. This pulls the piece into shape around the pins. Basically, you are ironing it without an iron, which flattens it and spoils the effect.

When working with larger pieces, it is easier to pin it into shape first, then use a spray gun to dampen it.

Happy Blocking!