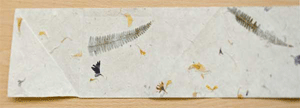
I was shown how to make this little notebook a few years ago and, on finding it at the bottom of my craft drawer, decided to share it. The photos aren't great as I was playing with my new lens and I didn't take a whole lot of time over editing as I wanted to get it done!
 Step 1
Cut two strips of paper, one patterned and one plain. They can be any size you would like but must be 8 times as long as they are wide and the plain one should be a little smaller than the patterned one.
 Step 2
Fold the plain piece into 8 equal sections. Each one should be a square.
This is the pages for your book.
.
Repeat for the patterned piece but fold all the creases both ways. Then make the additional folds, again folding both ways.
 Step 3
Lay the patterned piece flat on the table with the right side up.
.
Fold at fold 1
.
.
.
.
.
.
Step 6
Turn the whole thing over.
.
.
.
.
.
Step 8
Fold at fold 5.
.
Step 9
Fold at fold 4 and tuck the flap under.
.
.
.
 Step 10
Turn the whole thing around and repeat steps 4 to 9 for the other side.
This is the cover for your book.
.
 Step 11
Turn the cover over and place the plain piece as shown in the picture.
.
.
.
.
.
.
.
.
 Step 12
Slide the end squares of the pages into the cover and fold in half.
If you would like a pdf version of these instructions, you can download it here.


No comments:
Post a Comment
I would love to hear what you think about my post but please, no spam. All comments are moderated and all spam is deleted.